Home
Categories
Dictionary
Glossary
Download
Project Details
Changes Log
What Links Here
FAQ
License
UserInputs graphical interface
1 Top panel
1.1 Input tab
1.2 Output tab
1.2.1 List of datas
1.3 Invoking a service
1.4 Importing a service content
1.5 Importing a complex data content
2 Bottom panel
2.1 Showing the time stamp
2.2 Actions on the bottom panel
3 Menu bar
4 See also
1.1 Input tab
1.2 Output tab
1.2.1 List of datas
1.3 Invoking a service
1.4 Importing a service content
1.5 Importing a complex data content
2 Bottom panel
2.1 Showing the time stamp
2.2 Actions on the bottom panel
3 Menu bar
4 See also
The graphical interface of the userInputs application has two panels:
Right clicking on a service shows a menu allowing the following actions:
Right clicking on a service shows a menu allowing the following actions:

The bottom part of the tab for an Output presents the list of datas for the currently selected service, and an "Invoke" button for a service for which the userInputs module provides data. For example:
It is possible to navigate through the data structure for each data. In the case of a service for which the module provides data, it is possible to modify the data at each level of the structure. For example for a structure:
We can for example use the following JSON file to import:
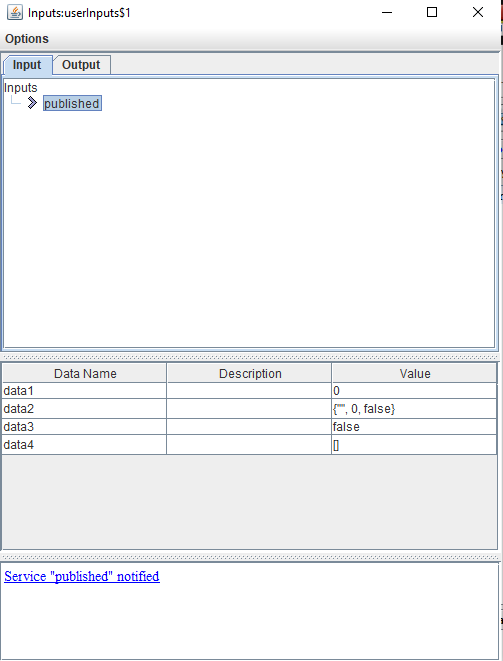
The bottom panel presents the notifications for services for which the userInputs application is notified. For example:
Upon clicking on a service in the area, you will be shown the content of this service in the "Inputs" tree. By default the values for the service datas are the last values of these datas for the service. It you want to see the value of the datas at the moment of the service reception, you will need to set the

- The top panel presents the datas for the input or output services for which the userInputs is attached. This panel has two tabs:
- The values for the datas for each service are presented. For services for which the userInputs application is notified, the last value is presented. For services for which application is a provider, an "Invoke" button allows to invoke the service with the last value fo the data
- The bottom panel presents the notifications for services for which the userInputs application is notified
- The menu bar allows to configure the history options
Top panel
The top panel has two tabs:- The "Input" tab presents:
- The list of services for which the userInputs module receives data
- A table showing the values for all the datas in the selected service
- The "Output" tab presents presents:
- The list of services for which the userInputs module provides data
- A table showing the values for all the datas in the selected service
- An "Invoke" button to invoke the service
- The module is a provider and a susbcriber of the same service
- The service is a request-response Service
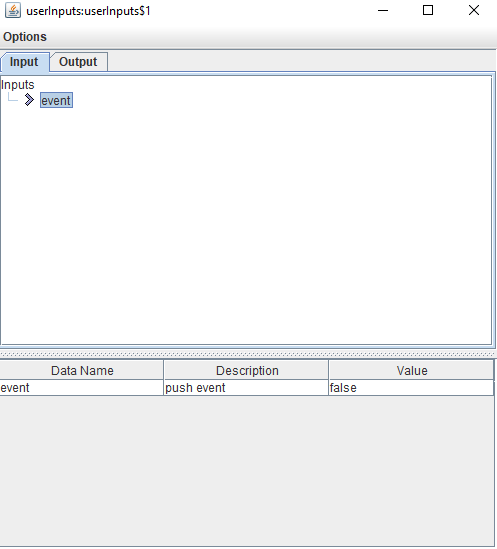
Input tab
The top part of the tab presents the list of services for which the userInputs module receives data.
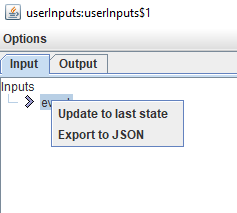
Right clicking on a service shows a menu allowing the following actions:
- "Update to last state": update the content shown in the bottom part of the tab to the last content for the service
- "Export to JSON": export the content of the service as a JSON file
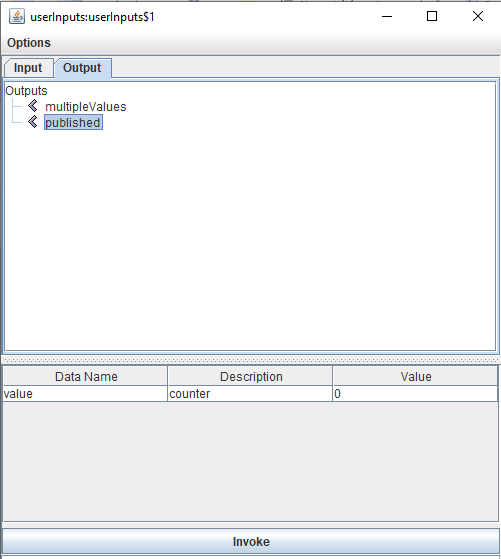
Output tab
The top part of the tab presents the list of services for which the userInputs module provides data.
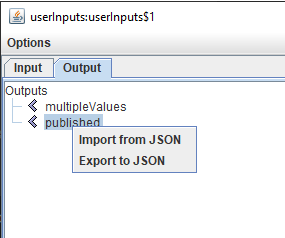
Right clicking on a service shows a menu allowing the following actions:
- "Import from JSON": import the values of the datas of this service using a JSON file
- "Export to JSON": export the content of the service as a JSON file
List of datas
The bottom part of the tab for an Input or an Output service presents the list of datas for the currently selected service. For an Output service (in the Output tab), it also presents an "Invoke" button for a service for which the userInputs module provides data. For example:
The bottom part of the tab for an Output presents the list of datas for the currently selected service, and an "Invoke" button for a service for which the userInputs module provides data. For example:
It is possible to navigate through the data structure for each data. In the case of a service for which the module provides data, it is possible to modify the data at each level of the structure. For example for a structure:
Invoking a service
Clicking on the "Invoke" button for a service for which the module provides data allows to invoke the selected service.Importing a service content
Right-clicking on the selected service allows to import the values of the datas of this service using a JSON file. For example, suppose the following types definition:<types> <simpleType name="bool" baseType="boolean" /> <simpleType name="string" baseType="string" /> <simpleType name="int" baseType="int" /> <arrayType name="arrayOfInt" type="int" /> <structType name="struct"> <field name="string" type="string" /> <field name="int" type="int" /> <field name="bool" type="bool" /> </structType> <arrayType name="array" type="int" /> </types>And the service definition:
      <publish name="published">
         <data name="data1" type="int" />
         <data name="data2" type="struct" />
         <data name="data3" type="bool" />
         <data name="data4" type="array" />
      </publish>
We can for example use the following JSON file to import:
      {
        "data1": 10,
        "data3": true,
        "data2": { "string": "TOTO", "int": 10, "bool": true },
        "data4": [10, 20]
      }
Importing a complex data content
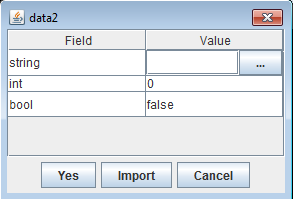
Clicking on the "Import" button for a complex data panel allows to import the value for this data using a JSON file. For example, suppose the following types definition:<types> <simpleType name="bool" baseType="boolean" /> <simpleType name="string" baseType="string" /> <simpleType name="int" baseType="int" /> <arrayType name="arrayOfInt" type="int" /> <structType name="struct"> <field name="string" type="string" /> <field name="int" type="int" /> <field name="bool" type="bool" /> </structType> <arrayType name="array" type="int" /> </types>And the service definition:
      <publish name="published">
         <data name="data1" type="int" />
         <data name="data2" type="struct" />
         <data name="data3" type="bool" />
         <data name="data4" type="array" />
      </publish>
If we open the "data2" panel, we will have the following popup window:
We can for example use the following JSON file to import:
{ "string": "TOTO", "int": 10, "bool": true }
Bottom panel
Main Article: history properties
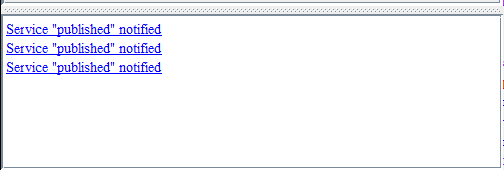
The bottom panel presents the notifications for services for which the userInputs application is notified. For example:
Upon clicking on a service in the area, you will be shown the content of this service in the "Inputs" tree. By default the values for the service datas are the last values of these datas for the service. It you want to see the value of the datas at the moment of the service reception, you will need to set the
keepHistory property to true.
Showing the time stamp
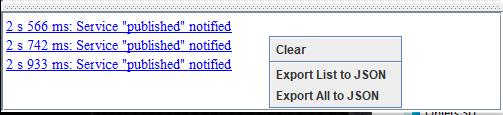
If you set true to theshowTimeStamp value, the time stamp of each notification will be shown alongside the name of the service:
Actions on the bottom panel
The following actions are available by right clicking on the panel:- "Clear": clear the content of the panel
- "Export List to JSON": export the list of notifications to a JSON file
- "Export All to JSON": export the list of notifications and their datas to a JSON file. it is only available if the
keepHistoryproperty is set to true
Menu bar
The menu bar allows to configure the history properties. By default the values of these properties are those defined for the module.See also
- UserInputs application: The userInputs application allows the user to invoke services or be notified from services manually
- Built-in Applications: This article present the built-in Applications distributed with the framework
×
![]()
Categories: builtin-applis