Home
Categories
Dictionary
Glossary
Download
Project Details
Changes Log
What Links Here
FAQ
License
Netbeans configuration
1 Netbeans installation
2 Create a Netbeans project
3 Project space overview
4 Reference the framework jar file for your project
5 Configure the build.xml file
5.1 Producing more than one jar file in the project
5.2 Adding a runtime ant target
5.3 Adding a debug ant target
6 Notes
7 See also
2 Create a Netbeans project
3 Project space overview
4 Reference the framework jar file for your project
5 Configure the build.xml file
5.1 Producing more than one jar file in the project
5.2 Adding a runtime ant target
5.3 Adding a debug ant target
6 Notes
7 See also
This article explains how to configure netbeans to develop Java modules in the framework for the tutorials.
First you need to install and configure Netbeans. See the referenced article above to know what to do to perform this installation.
You will be prompted with a configuration Window asking you what type of project you want to create. Choose "java Class Library" in the first panel. Then click "Next".
Then you have to decide where you want to put the project. The click "Finish" to finish the configuration.
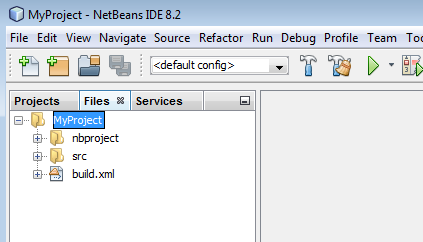
Files: this presents the file structuration of your project:
Services: this tab is not useful in our case.
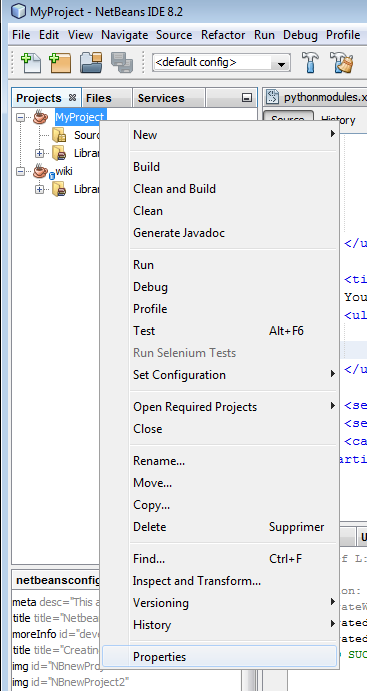
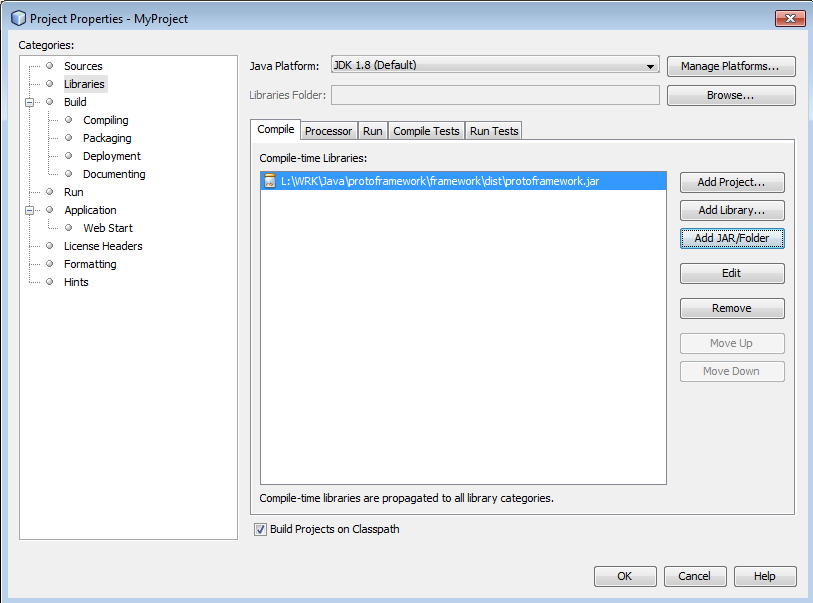
Go in the "Projects" tab: Right click on the "Projects" root in the tree and select "Properties" at the bottom of the menu.
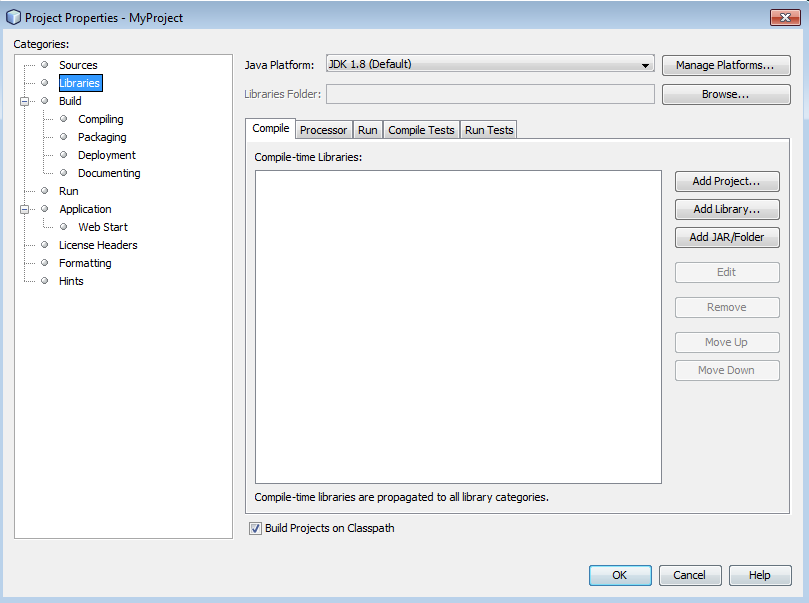
Select the "Libraries" node in the window:
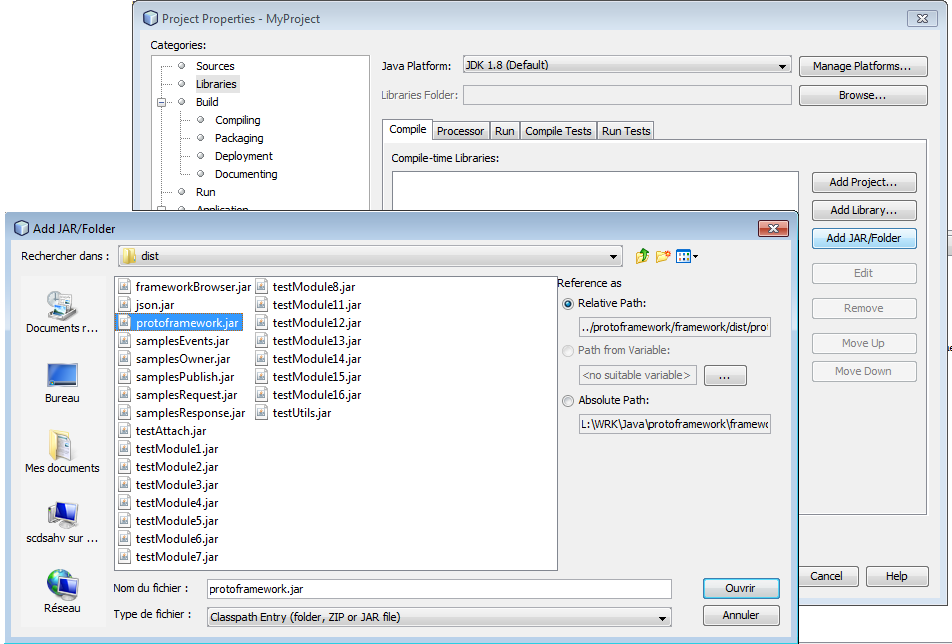
Add the protoFramework jar file in the library:
You should see the following content for the library[1]
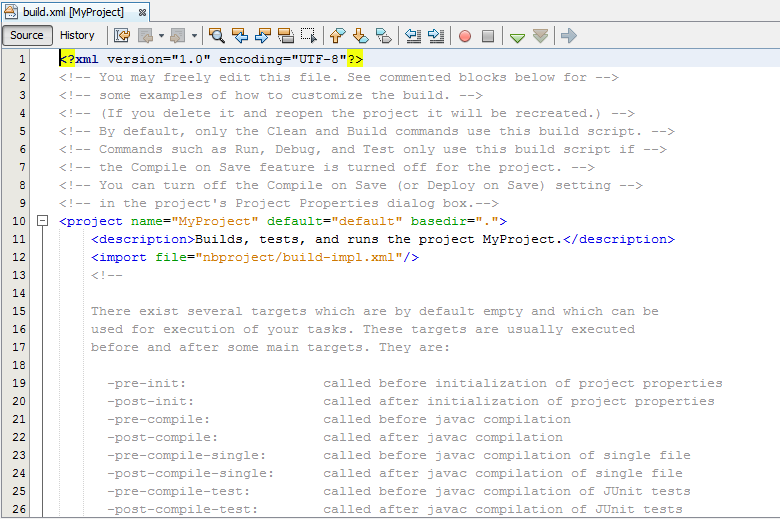
Go in the "Files" tab and open the
To be able to start the framework on normal or debug mode, you will need to add two targets in this file: button.
The jar file will be generated in the dist sub-directory and its name will be the name of the project.
For example, with the following project:
you will only have the MyProject.jar jar file in the dist sub-directory.
It is possible to prpduce more than one jar file by editing the xml file. For example to produce two jar files for the first tutorial:
Netbeans installation
Main Article: Netbeans installation
First you need to install and configure Netbeans. See the referenced article above to know what to do to perform this installation.
Create a Netbeans project
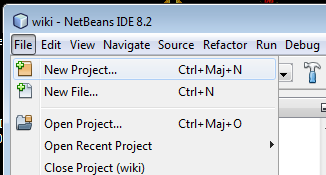
To create a Netbeans project, you need to choose in the upper menu File = > New Project.
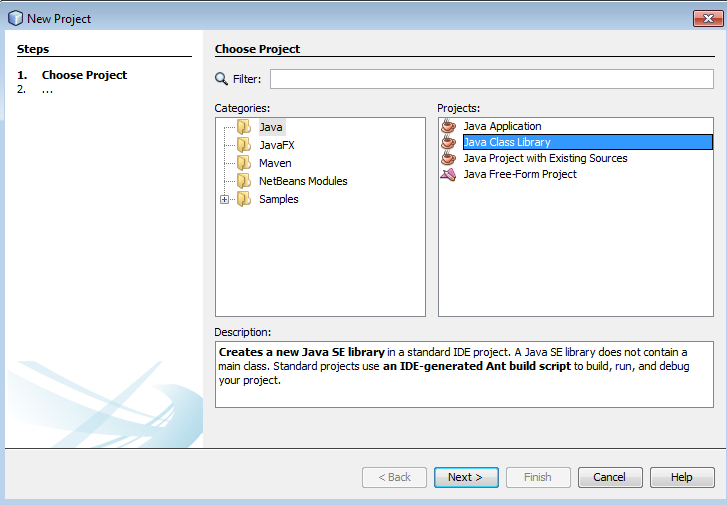
You will be prompted with a configuration Window asking you what type of project you want to create. Choose "java Class Library" in the first panel. Then click "Next".
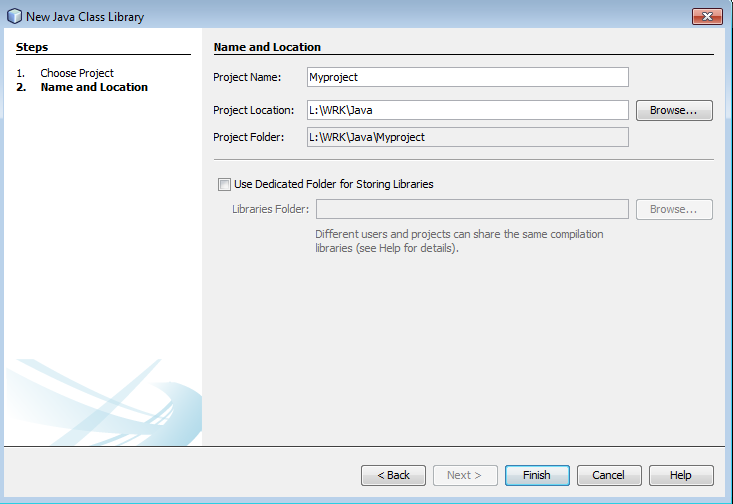
Then you have to decide where you want to put the project. The click "Finish" to finish the configuration.
Project space overview
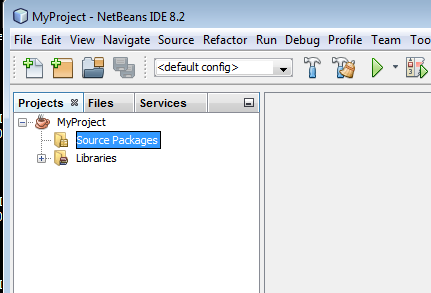
After creating your new project, you will see that the left panel has three tabs:Projects: this presents the package structuration of your project:
Files: this presents the file structuration of your project:
Services: this tab is not useful in our case.
Reference the framework jar file for your project
You will need to reference the framework jar file in your project to be able to build your project. To do this:Go in the "Projects" tab: Right click on the "Projects" root in the tree and select "Properties" at the bottom of the menu.
Select the "Libraries" node in the window:
Add the protoFramework jar file in the library:
You should see the following content for the library[1]
The path of the
:protoFramework.jar may change depending on were it is on your PC
Configure the build.xml file
Main Article: Developing Java modules
Go in the "Files" tab and open the
build.xml file: You will see:
To be able to start the framework on normal or debug mode, you will need to add two targets in this file:
- An ant target to start the framework on normal mode
- An ant target to start the framework on debug mode
Producing more than one jar file in the project
By default there is only one jar file associated with the project. You execute the build by clicking on the
button.The jar file will be generated in the dist sub-directory and its name will be the name of the project.
For example, with the following project:
you will only have the MyProject.jar jar file in the dist sub-directory.
It is possible to prpduce more than one jar file by editing the xml file. For example to produce two jar files for the first tutorial:
      <target depends="init,compile,-pre-jar,-do-jar-without-manifest,-post-jar" description="Build JAR." name="jar"/>
      <target name="-do-jar-without-manifest" depends="-samplePublish, -sampleEvent" />

      <target name="-samplePublish" depends="init,compile,-pre-pre-jar,-pre-jar" >
         <jar description="jar binary file" compress="true" jarfile="${dist.dir}/samplesPublish.jar">
            <fileset defaultexcludes="yes" dir="${build.classes.dir}" >
               <include name="org/da/samples/protoframework/publish/**/*.class"/>
            </fileset>
         </jar>
      </target>

      <target name="-sampleEvent" depends="init,compile,-pre-pre-jar,-pre-jar" >
         <jar description="jar binary file" compress="true" jarfile="${dist.dir}/samplesEvents.jar">
            <fileset defaultexcludes="yes" dir="${build.classes.dir}" >
               <include name="org/da/samples/protoframework/event/**/*.class"/>
            </fileset>
         </jar>
      </target>
Adding a runtime ant target
      <target name="Start my Module" description="Start my Module" depends="init" >
         <java classname="org.da.protoframework.model.core.Framework">
            <arg value="config=<path_to_the_configuration>/filelist.xml"/>
            <classpath>
               <pathelement path="<path_to_the_framework>/protoframework.jar"/>
               <pathelement path="<path_to_the_framework>/lib/MDIUtilities-ui-LGPL.jar"/>
            </classpath>
         </java>
      </target>
Adding a debug ant target
      <target depends="init" name="Debug my Module" description="Debug my Module" >
         <property name="debug.class" value="org.da.protoframework.model.core.Framework"/>
         <fail unless="debug.class">Must select one file in the IDE or set debug.class</fail>
         <j2seproject1:nbjpdastart name="${debug.class}"/>
         <j2seproject3:debug classname="${debug.class}">
            <customize>
               <arg line="config=<path_to_the_configuration>/filelist.xml"/>
            </customize>
         </j2seproject3:debug>
      </target>
Note that if you add a debug ant target, you will need to define the declaration for
j2seproject1: and j2seproject3. For example:<project name="myModule" default="default" basedir="." xmlns:j2seproject1="http://www.netbeans.org/ns/j2se-project/1" xmlns:j2seproject3="http://www.netbeans.org/ns/j2se-project/3" > ... <project>
×
![]()
Notes
- ^ The path of the
protoFramework.jarmay change depending on were it is on your PC
See also
- Developing Java modules: This article explains how to develop Java modules in the framework
- Tutorials: This tutorial reuse the first tutorial, but the two modules are in two different framework instances
×
![]()
Categories: tutorials