Home
Categories
Dictionary
Glossary
Download
Project Details
Changes Log
What Links Here
FAQ
License
Setting a Visual Studio project for a C module
1 Create the project
1.1 Configure for 64 bits
1.2 Change the application type to a dll
2 Create the main DLL C file
3 Change the generated code from C++ to C
4 Notes
5 See also
1.1 Configure for 64 bits
1.2 Change the application type to a dll
2 Create the main DLL C file
3 Change the generated code from C++ to C
4 Notes
5 See also
This article explains how to initialize a Visual Studio project to create a C module. Note that the following presentation will be performed with Visual Studio 2005, but creating the project with newer versions should be similar.

We must now change the project properties:

In the Configuration Manager, select "New" for the platform.

And choose "x64" for the platform.


Go in "Configuration Properties", then "General", and change the "Configuration Type" from "Application (.exe)" to "Dynamic Library (dll)".

Then rename the file and change its extension from cpp to c.
Create the project
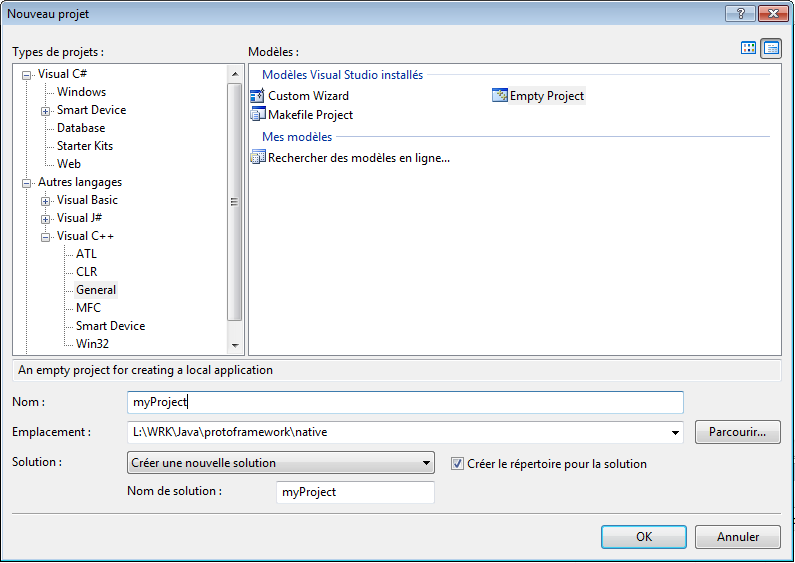
First create a new empty Visual Studio project. You must create the project under the "Visual C++" => General templates.
We must now change the project properties:
- In this article, we will consider that the code must be configured for 64 bits[1]
Rather than the default 32 bits
- By default Visual Studio has defined the project as an application, but we must change its type to a dll
- Also we must change the generated code from C++ to C
Configure for 64 bits
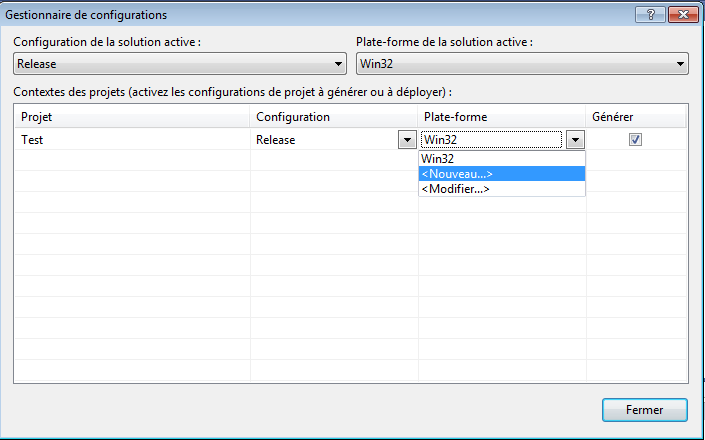
The platform solutions in the toolbar is configured by default as "Win32". We must change that. Go in the "Win32" combobox, and select the "Configuration Manager" item.
In the Configuration Manager, select "New" for the platform.

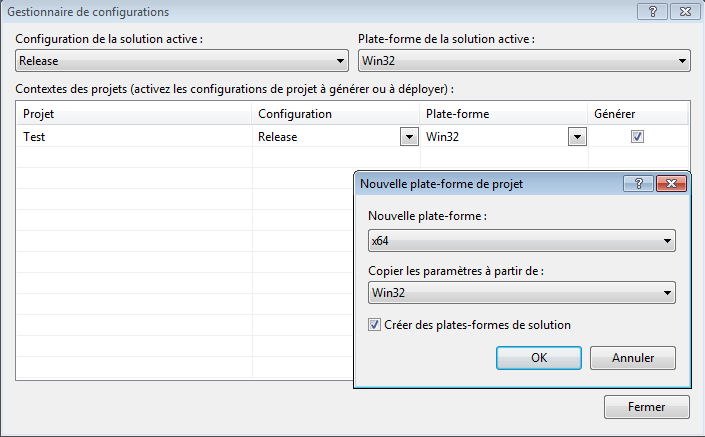
And choose "x64" for the platform.

Change the application type to a dll
By default Visual Studio has defined the project as an application. Go to the project properties window:
Go in "Configuration Properties", then "General", and change the "Configuration Type" from "Application (.exe)" to "Dynamic Library (dll)".
Create the main DLL C file
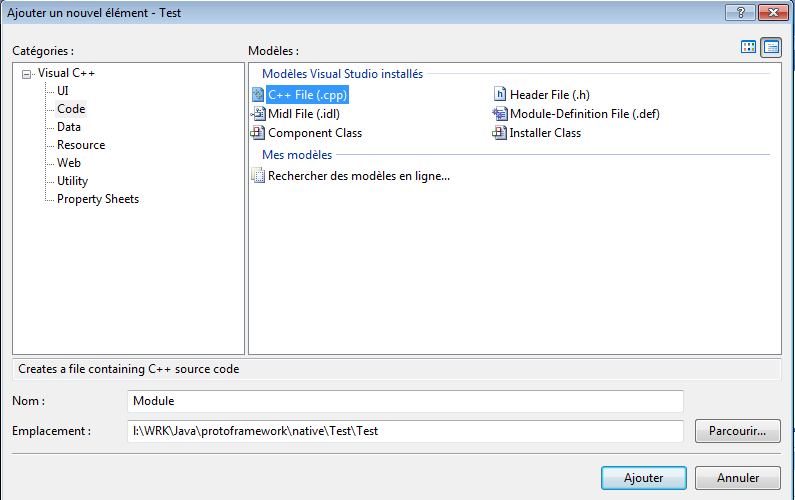
We will now create the file which will contain the main dll C functions. Right click on "Source Files" in the navigator, and Creata a cpp file[2]
It is not possible to create directly a C file in Visual Studio
.
Then rename the file and change its extension from cpp to c.
Change the generated code from C++ to C
Go in in "Configuration Properties", then "C/C++", then "Advanced", and change the "Compile As" to Compile As C Code"[3]
Note that we will only ber able to do this after we have added at least one file in the project
. Notes
See also
- C modules: C modules are modules which are implemented as dlls coded in C
×
![]()
Categories: concepts